
Bitrix24
The Bitrix24 channel allows chatbots and agents to chat with customers via the Bitrix24 Open Channels.
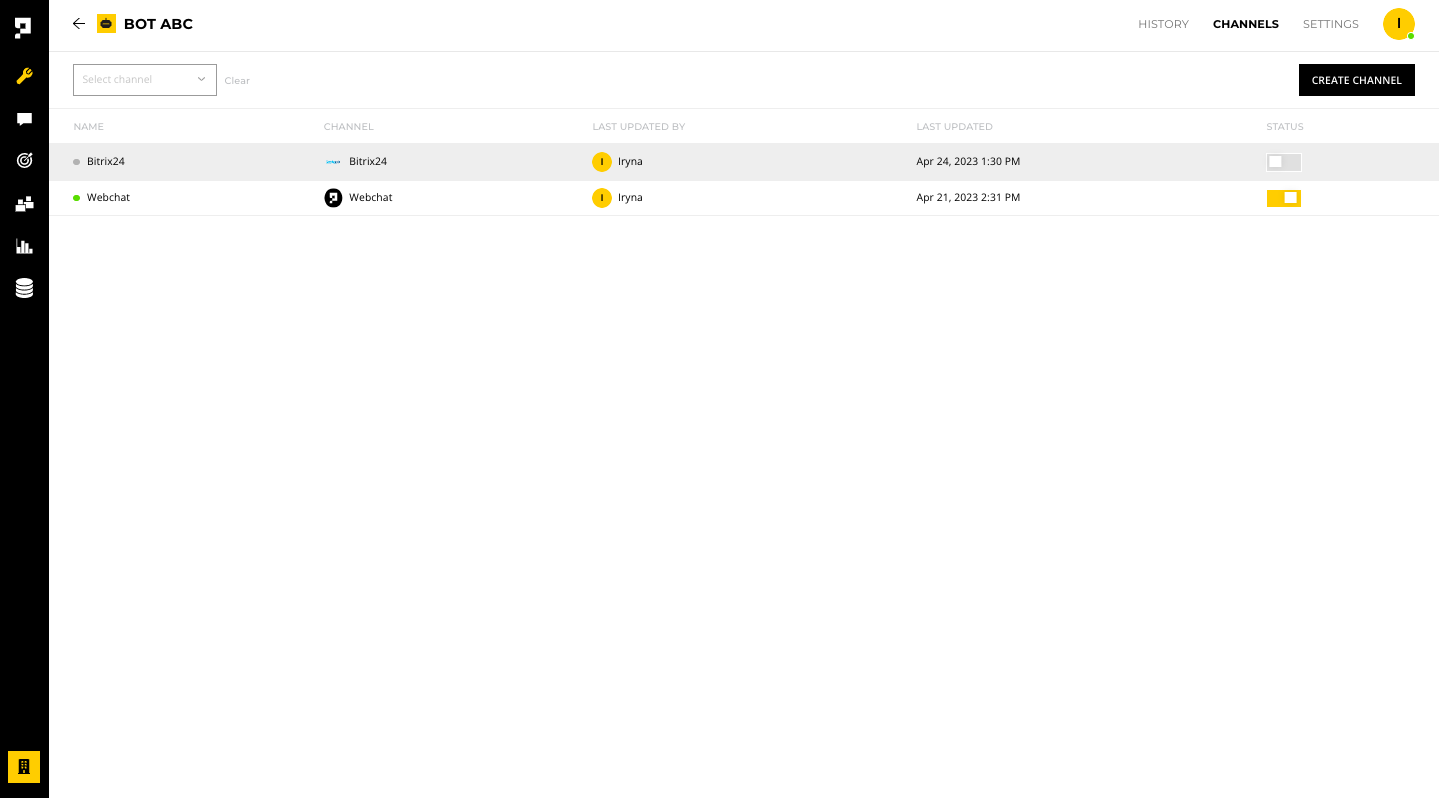
Once you add a Bitrix24 channel, click anywhere on the channel row to configure it.
Note
The Bitrix24 channel must be enabled before you test it. To enable the channel, click the STATUS toggle.
Before starting
Before starting, you must at least have a Bitrix24 Basic plan account to integrate Proto's chatbot.
Settings
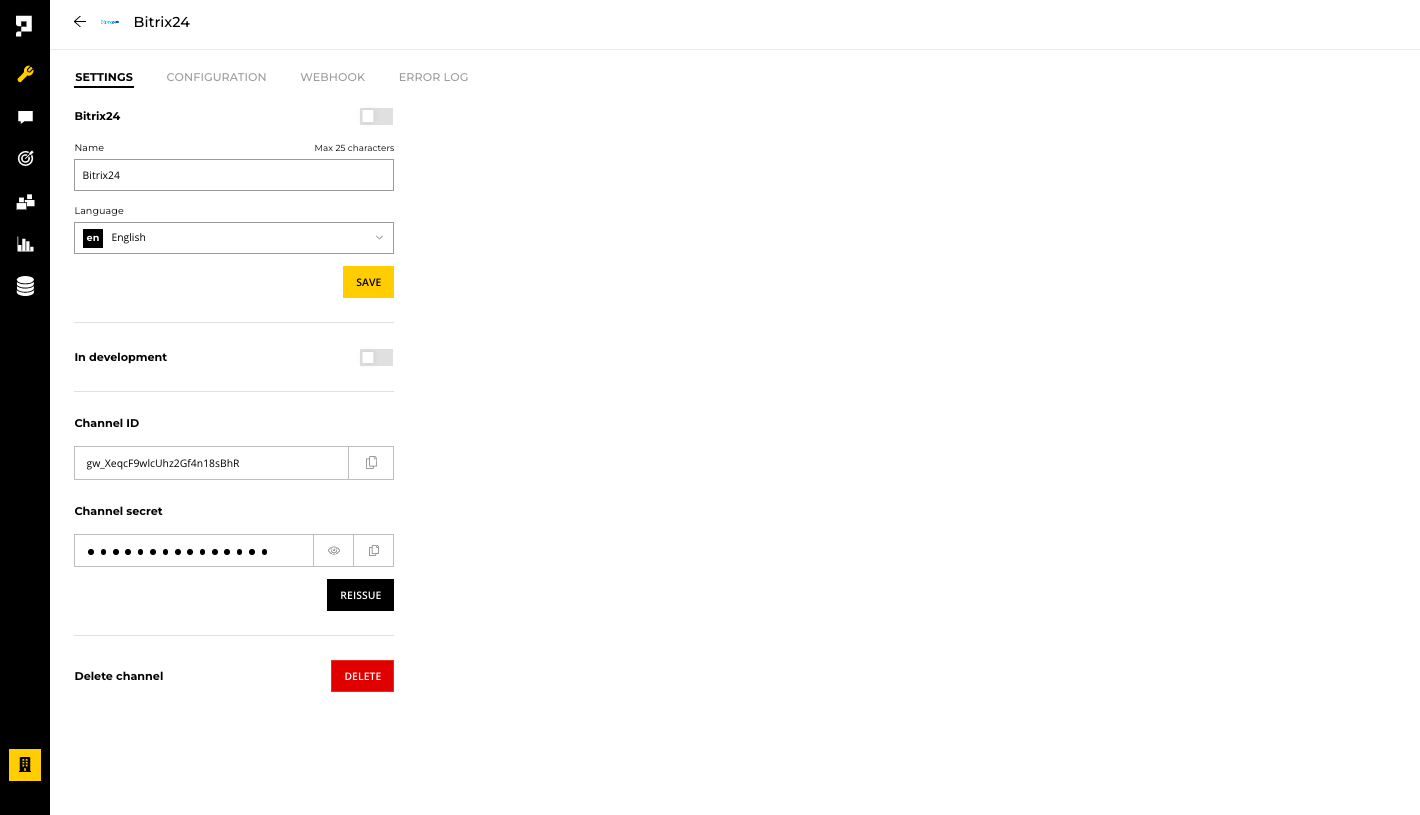
Under the SETTINGS tab, you have the following options:
- Enable - make the channel live to the public
- Name - edit the channel name within the AICX platform
- Language - set the default language for customers using this channel
- In development - make chatbot edits live only after when the chatbot is deployed
- Channel ID and Secret - required for the deploy script
- Delete - remove the channel
Important
Once a Bitrix24 channel is deleted, you will need to update the channel webhook information on your Bitrix24 Local Application configuration again.
Reminder
Once the channel is set to Live, please make sure you click the Deploy button every time you made changes on the bot.
Bitrix24 Local Application setup
To add a chatbot on Bitrix24 Open Channel, you must create a Local Application on you Bitrix24 account:
- In your Bitrix24 account, select Applications > Market > Developer Resources > Common Use Cases > Other.

- Select Local Application and fill in the required fields.

- In your Local Application configuration, select Server.

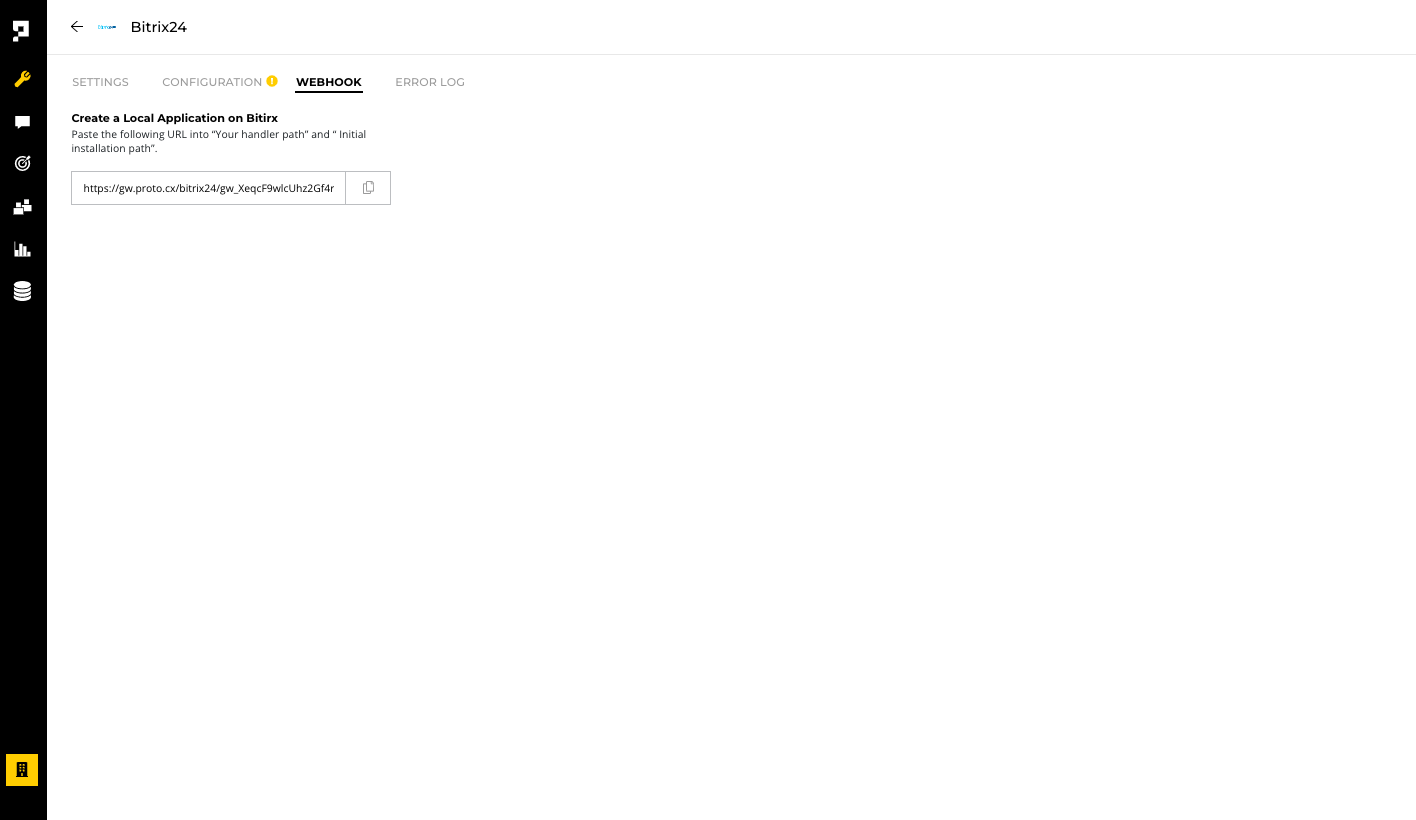
- Go to Proto AICX platform, copy the Webhook URL from your chatbot Bitrix24 channel's WEBHOOK tab and paste it in the Bitrix24 Local Application Your handler path and Initial installation path fields.
- Tick the Script only (no user interface) and assign the following permissions for the application.
- Creating and managing Chat bots (imbot)
- Open Channels (imopenlines)
- Users (user)
- CRM (crm)
- Drive (disk)
- Chat and Notifications (im)
- Click the Save button. The Application ID (client_id) and Application key (client_secret) will be generated. Copy the Application ID (client_id) and Application key (client_secret).

- Go to Proto AICX platform, in your chatbot Bitrix24 channel's CONFIGURATION tab, paste the Application ID (client_id) and Application key (client_secret) into the corresponding fields.
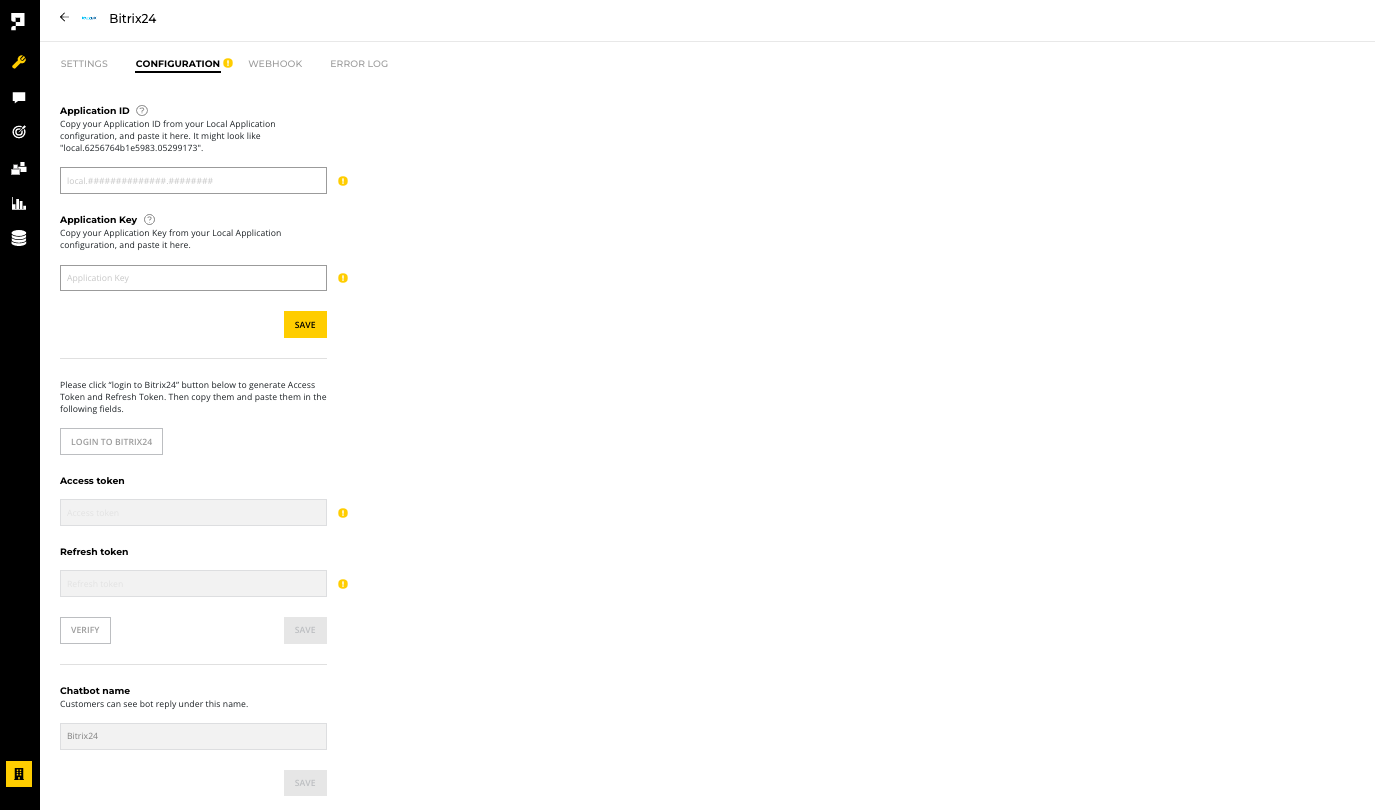
- Add your Bitrix24 instance domain into the Domain field and click Save. You may get your instance domain directly from your Bitrix24 platform URL.

- Click LOGIN TO BITRIX24 to generate an Access Token and Refresh Token.
- Paste it in the corresponding fields and click the Save button. You may test if your Bitrix24 Local Application is successfully connected to your chatbot Bitrix24 channel the by clicking the Verify button.

- Add your customized Chatbot name that will appear on your Bitrix24 Open Channel.
Note
If you are using the Bitrix24 on premise account, you can change your chatbot name directly in Control Panel > User list.
How To Fix Verification Failed Error / Unable to Enable Bitrix24 Channel Error
- Go to Applications > Market > Developer Resources > Integrations to check if your Local Application is successfully created
- Click REINSTALL in your Local Application and try verify the channel again.

Bitrix24 Open Channel setup
If you already have an Open Channel in your Bitrix24 Live Chat, you can add the Local Application chatbot as a first customer support tier to provide assistants to your customer before transferring the chat to a live agent.
- To add the Local Application chatbot to your Open Channel, go to your Open Channel and click CONFIGURE.

- Select the Chat Bots tab and tick Assign chat bot when a client enquiry is received. Select the chatbot you created in your Local Application.

- Configure your chatbot settings as follow and Save the settings:
- Activate chat bot - Each time a client starts conversation
- Transfer conversation from bot to a live agent after - any period of time
- Disconnect chat bot - after transferring the conversation to an agent
Note
In your Open Channel Auto Actions tab, if you have enabled the Use CRM form to ask for contact information in the live chat, please make sure to select Wait for customer's first message in the Show form field in order to pass the end user Contact ID to the chatbot.

Once finish setting up your Open Channel, you may start testing the chatbot through the Chat public link or the Open Channel in your Bitrix24 widget.
Identify end user in Bitrix24 Live Chat
For customers that are logged in to any of your services, you can add a widget.setUserRegisterData() JavaScript code to the page your website widget is connected to so your customers will not need to fill out the contact form again.
<script type="text/javascript">
window.addEventListener('onBitrixLiveChat', function(event)
{
	var widget = event.detail.widget;

	// Settings external user authentication
	widget.setUserRegisterData({
		'hash': '12b42ebcec7e3c26a313272c26efddbd',
		'name': 'John',
		'lastName': 'Smith',
		'avatar': 'http://files.smith.com/images/avatar-john.jpg',
		'email': '[email protected]',
		'www': 'https://bitrix24.com',
		'gender': 'M',
		'position': 'Loyal Customer'
	});

});
</script>
Note
This JavaScript code is use to identify the User in your Bitrix24 platform, if you need to use it to identify the end user in your Bitrix24 CRM Contacts, please add the end user email address in the
positionfield.
Transfer Chats to Bitrix24 Agents
- To transfer a chat to Bitrix24 agent from the chatbot, please add the Agent takeover block in the conversation flow where you would like to transfer the chat.
- Enable the "Takeover by third party agents" and click Save.
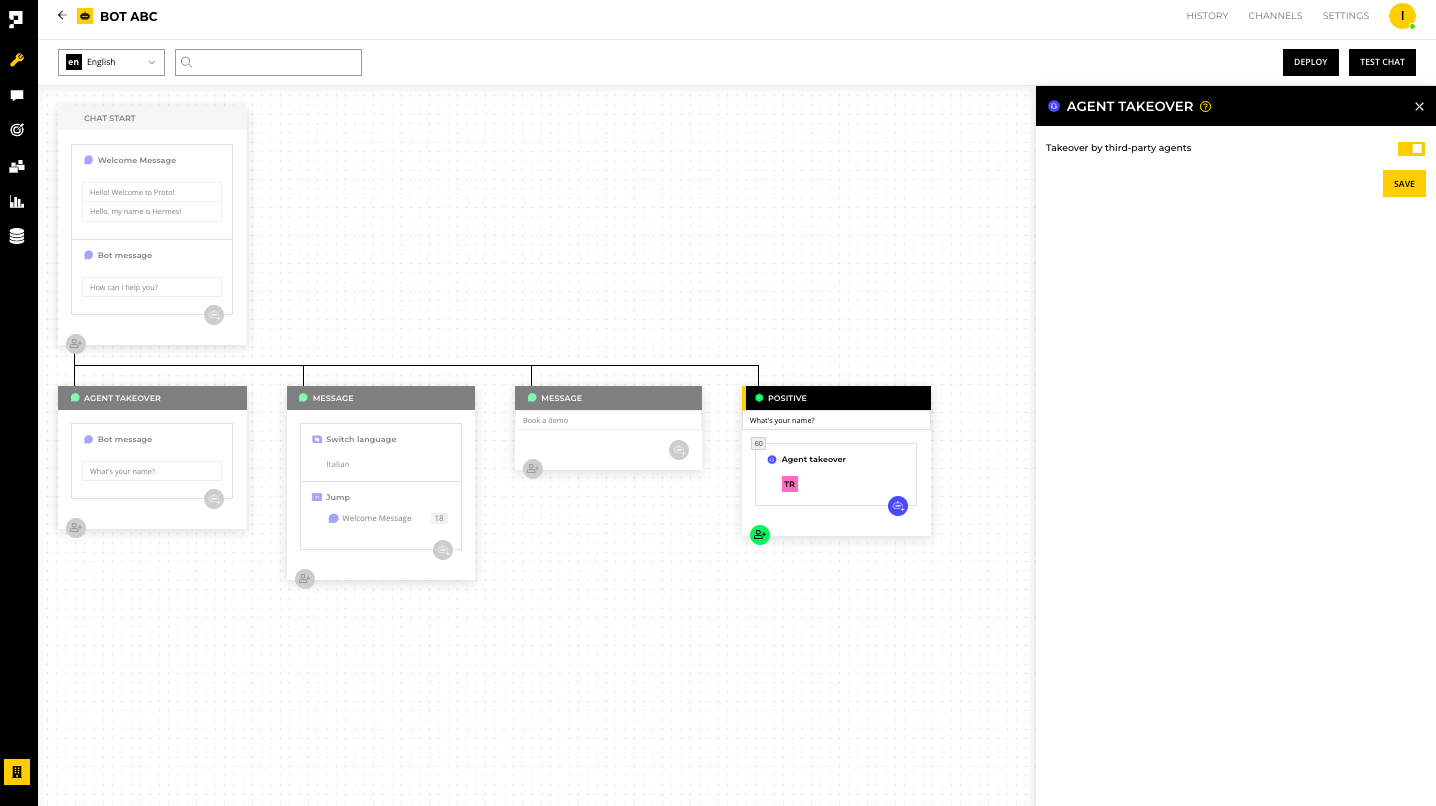
- The chat session will automatically end on Proto's chatbot and transfer to the Bitrix24 Open Channel agents when the end user reach that conversation flow.
Note
Proto's platform will not store the chat that are transferred to Bitrix24 live agents. Only the conversation with the chatbot will be store in the chatbot History page.
Updated over 1 year ago