
Webchat
The Webchat channel enables chatbots and agents to engage in conversations with customers through your website.
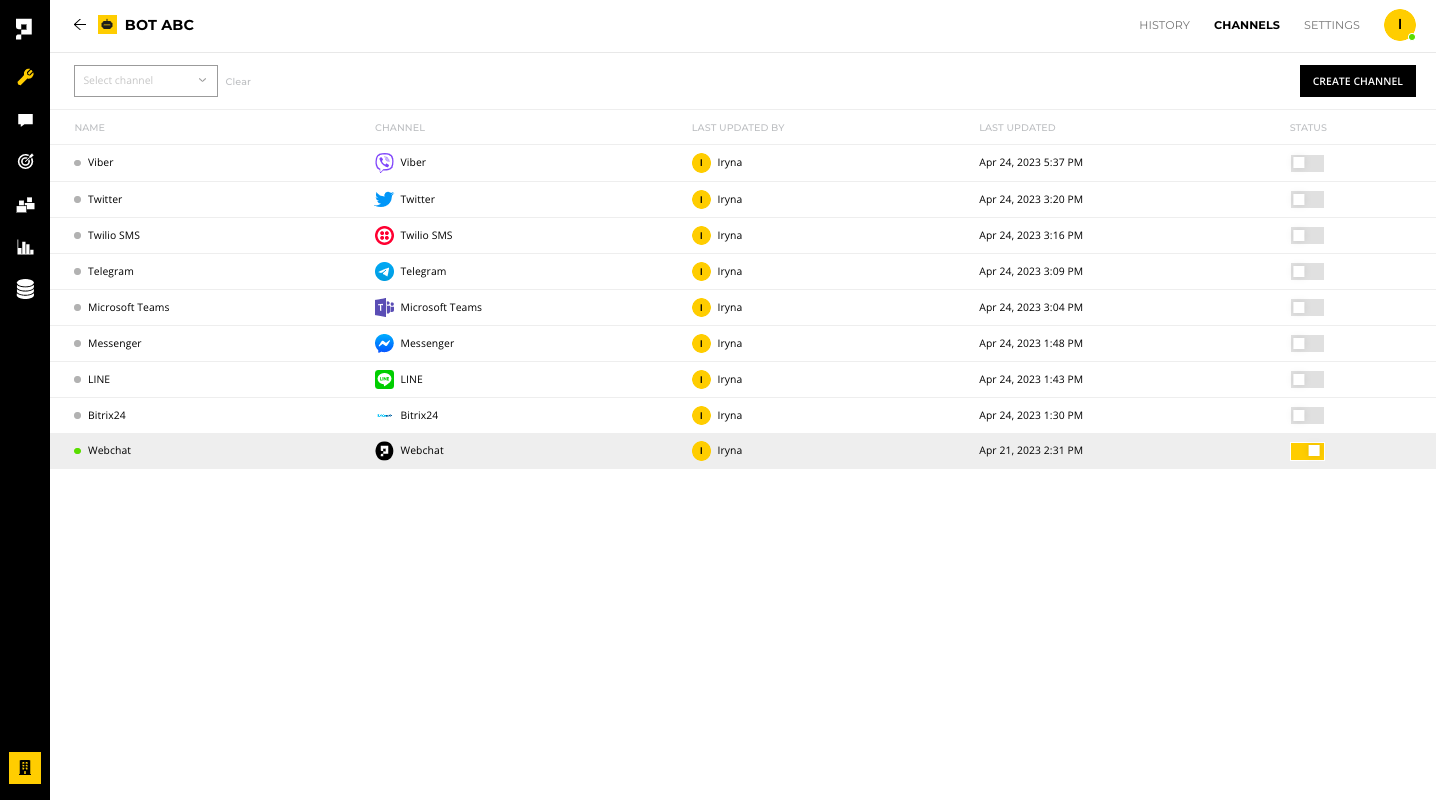
To configure a Webchat channel, simply click anywhere on the channel row.
Requirement
Please note that the channel must be enabled before you can test it on your website. To do so, simply toggle the STATUS button.
Settings
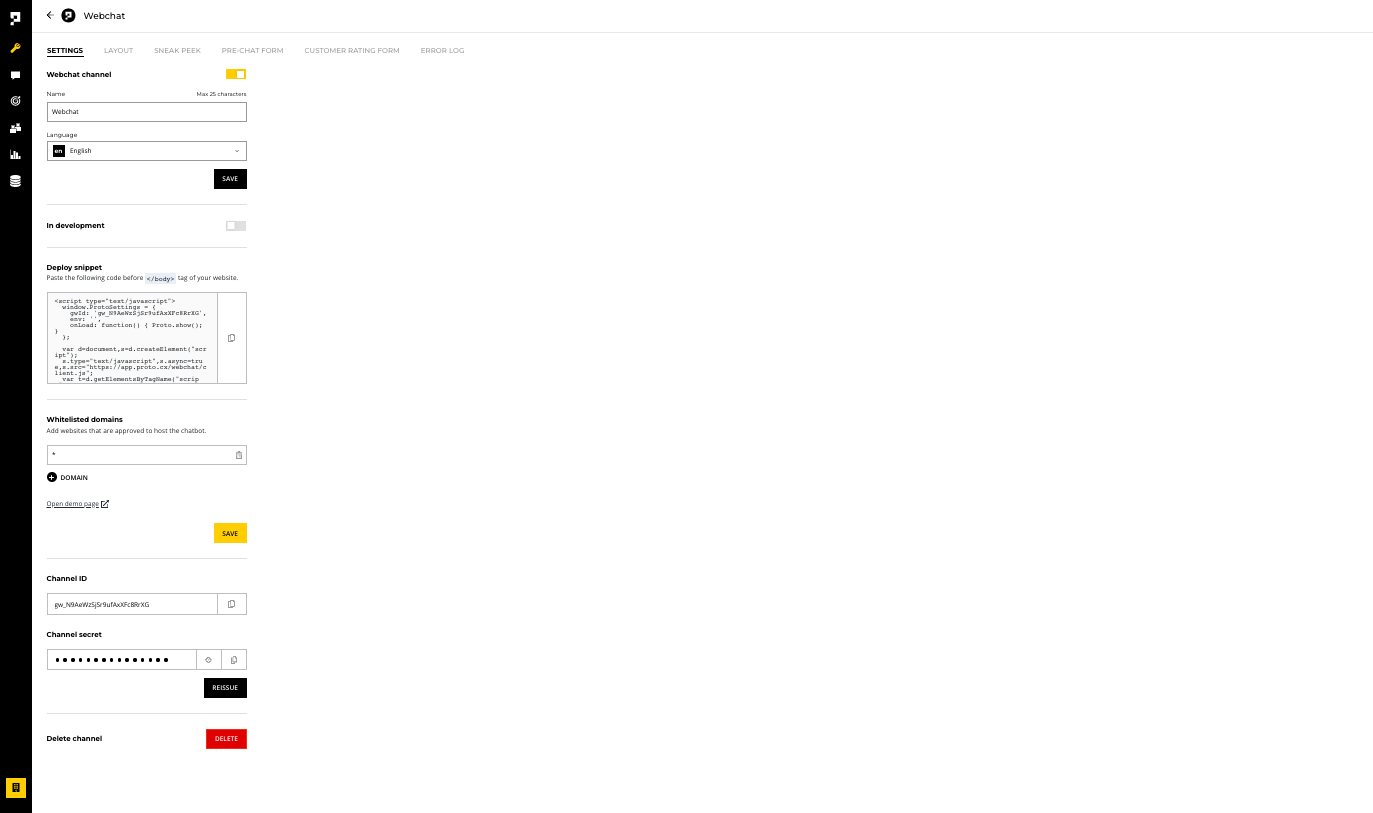
Under the SETTINGS tab for a Webchat channel, you have the following options:
- Enable: toggles the channel on or off, making it live or hidden from the public
- Name: lets you edit the channel name as it appears within the AICX platform
- Language: sets the default language for customers who use this channel
- In development - toggle the slider to make chatbot edits live only after when the chatbot is deployed
- Deploy snippet - This option provides you with the HTML code snippet that you can embed in your website's HTML code to activate the Webchat feature on your website.
- Whitelist domains - This option allows you to specify the list of domains that are permitted to host the Webchat. This prevents others from embedding the chatbot onto their websites without your consent.
- Demo page - This option provides a demo page where you can quickly test the Webchat feature before deploying it on your website. This allows you to preview the chatbot's behavior and make any necessary adjustments before going live.
- Channel ID and Secret: required for the deploy script used on your websites
- Delete: removes the channel from the AICX platform
- Open demo page: includes functionality to send e-mail transcripts to the user via email
Best practice
To improve website performance and avoid errors, it's recommended to place JavaScript
<script>tags just before the closing</body>tag instead of in the<head>section of your HTML. This allows the HTML to load before any of the JavaScript loads.
Requirement
When deploying the Webchat for testing purposes, a wildcard asterisk (*) is set to allow developers to embed the Webchat on any web page. However, it's important to remove the asterisk and add the specific website domains before publishing your website.
Note
Additionally, you can use Proto Script to customize the language or display of the Webchat. Refer to the Webchat API for more information.
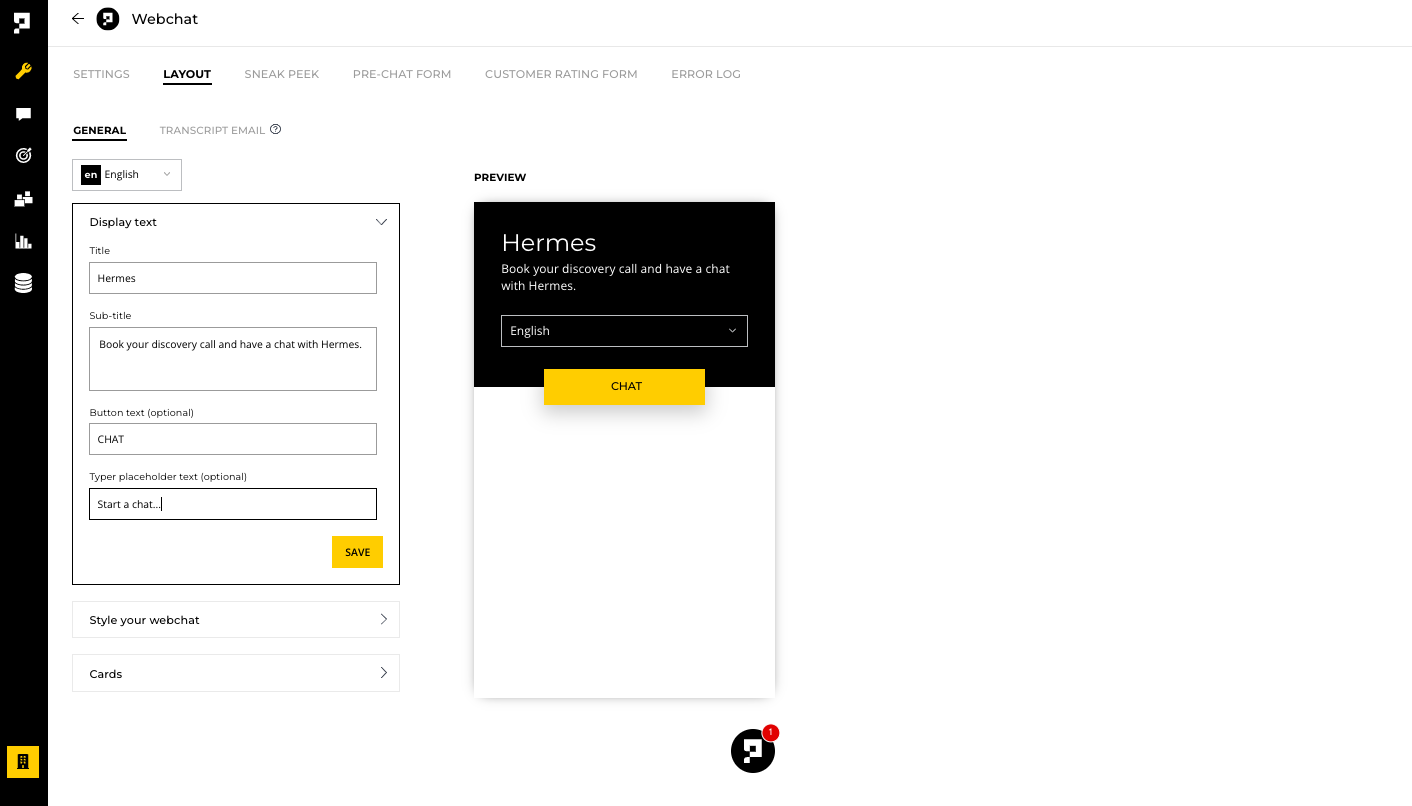
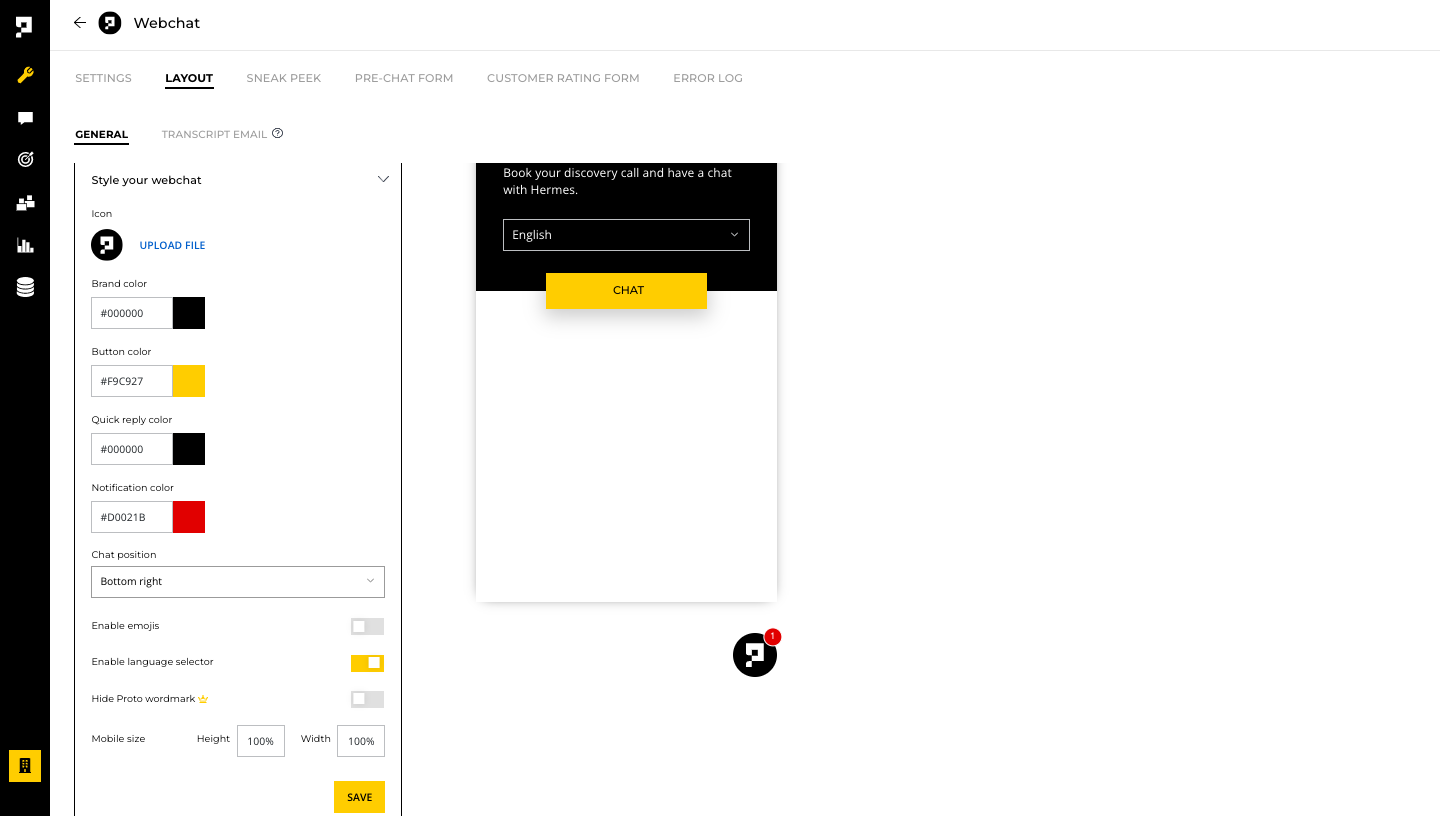
Layout
Under the LAYOUT tab, you can customize the display of the webchat interface for each language:
- Display text - edit the title, subtitle, chat button, and chat placeholder to match your branding and messaging style.
- Style your webchat - customize the widget to match your brand colors, choose the webchat position that fits your website, and add custom emojis to enhance the conversation experience.
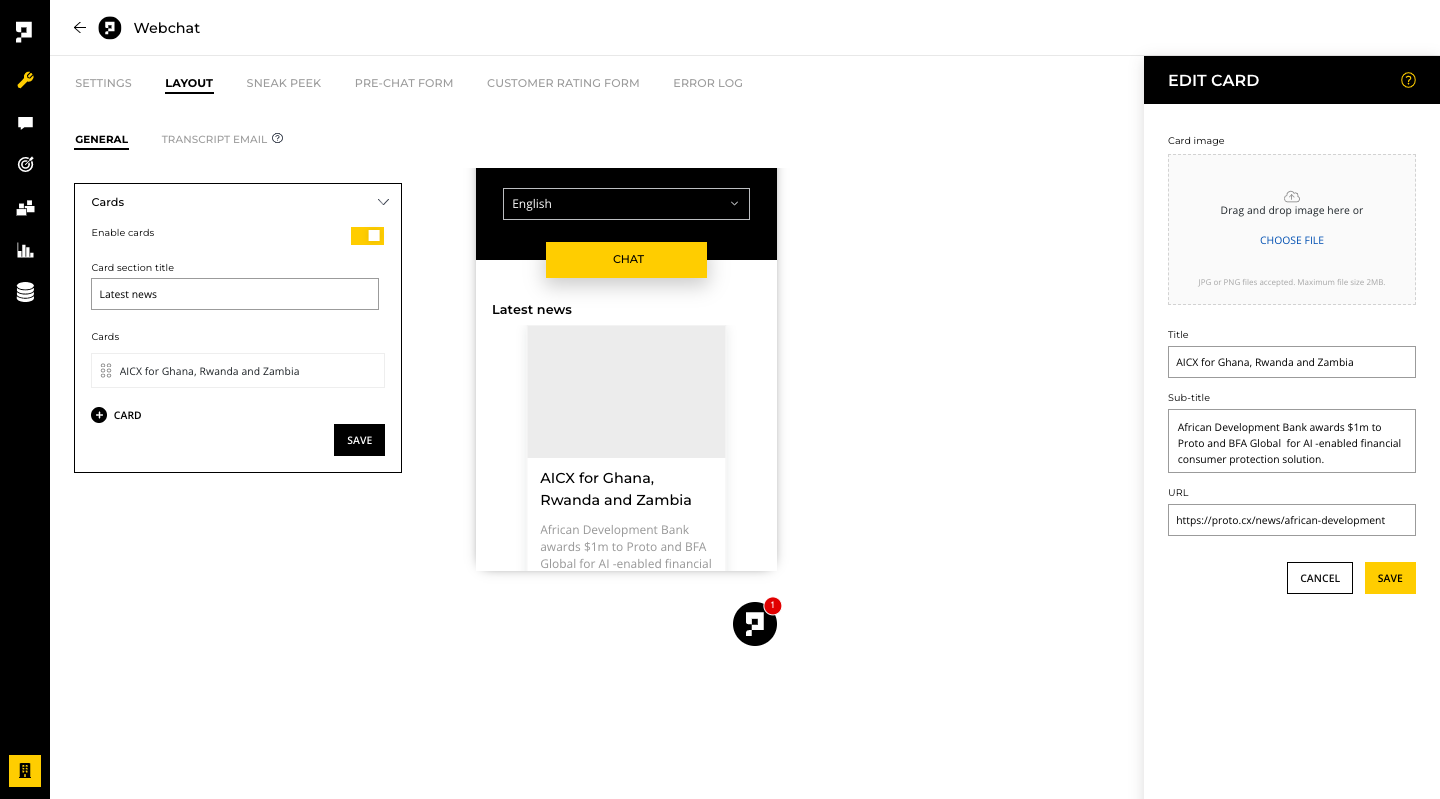
- Cards - edit the carousel cards displayed on the pre-chat page of the webchat. You can add, remove, or reorder cards, and customize the card's title, subtitle, image, and action button.
Sneak Peek
The Sneak Peek feature allows you to capture your website visitors' attention proactively. To add a pop-up message, go to the Sneak Peek tab in Webchat and click on Add Group. You can also rename the pop-up message by clicking on the pencil icon next to the group name.
To control which website or page the pop-up message should appear on, you can add the website domain or a specific URL path. You can create up to 5 groups of sneak peek messages on a webchat.
You can set the timing for the pop-up message to appear in three ways:
- Immediately after the page is loaded;
- After a specified number of seconds; or,
- Using the Sneak Peek API to control the timing based on user actions on a webpage.
You can set the language of the pop-up message and customize the message and up to three buttons. There are three types of buttons you can use on a sneak peek:
- Quick reply;
- Trigger; and,
- Hyperlink.
Please note that you must have at least one button on a sneak peek, and you can add up to a maximum of three buttons. After setting up your message and buttons, click Save to apply the changes.

Control Sneak Peek timing using API
You can trigger a sneak peek message via API three different ways:
- By using the group name you specified:
Proto.showSneakpeek('<group-name>'); - By creating a custom message and buttons with JavaScript objects; and,
Proto.showSneakpeek(
    {
        message: 'Message',
        buttons: [
            {
                'type': 'quickreply',
                'label': 'Button',
                'sendText': 'text',
            },
            {
                'type': 'trigger',
                'label': 'Trigger',
                'triggerName': 'code',
            },
            {
                'type': 'hyperlink',
                'label': 'Website',
                'url': 'https://proto.cx',
            },
        ]
    }
)
- By using helper API methods to create custom message and buttons.
Proto.showSneakpeek(
    {
        message: 'Message',
        buttons: [
            Proto.createSneakPeekQuickReplyButton('Button', 'text'),
            Proto.createSneakPeekTriggerButton('Trigger', 'code'),
            Proto.createSneakPeekHyperlinkButton('Website', 'https://proto.cx'),
        ]
    }
)
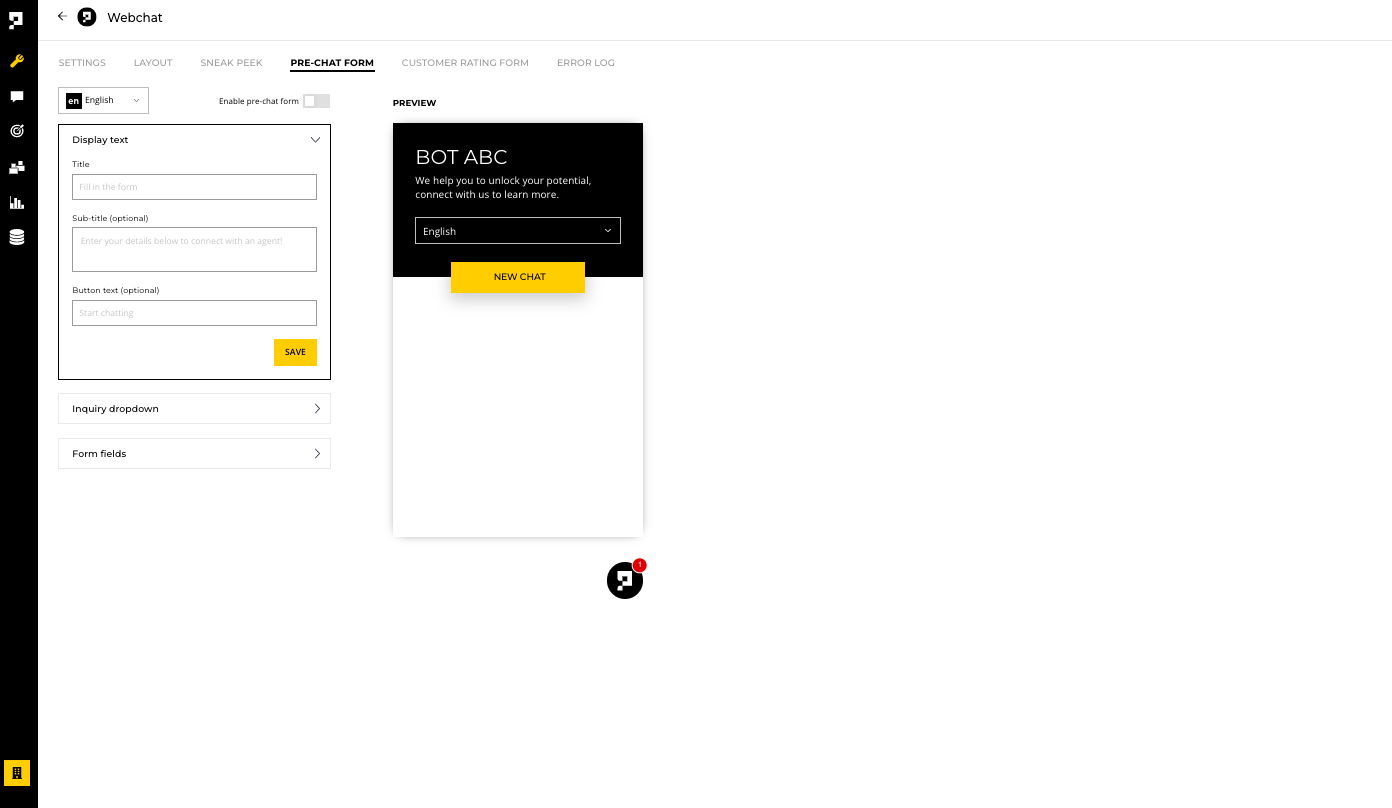
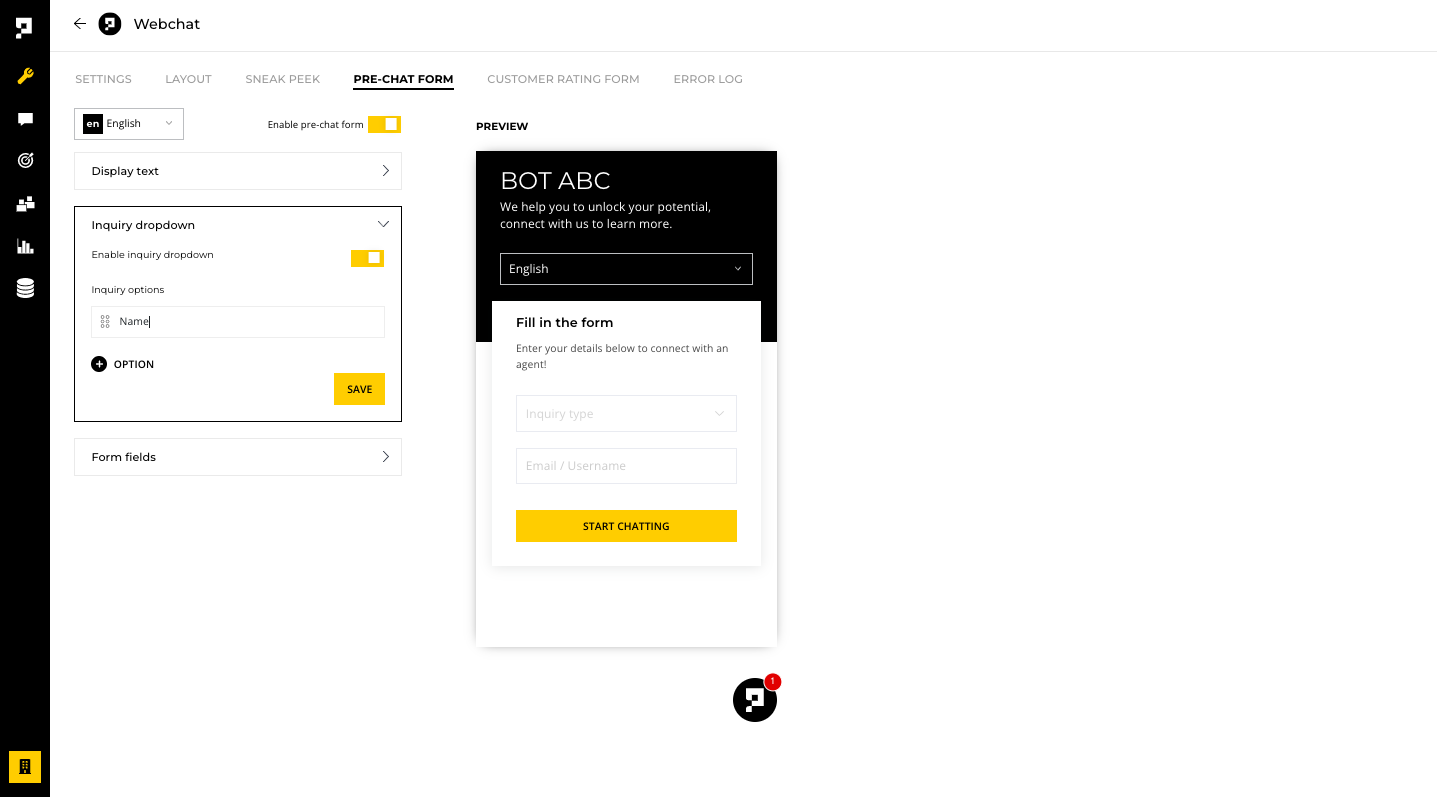
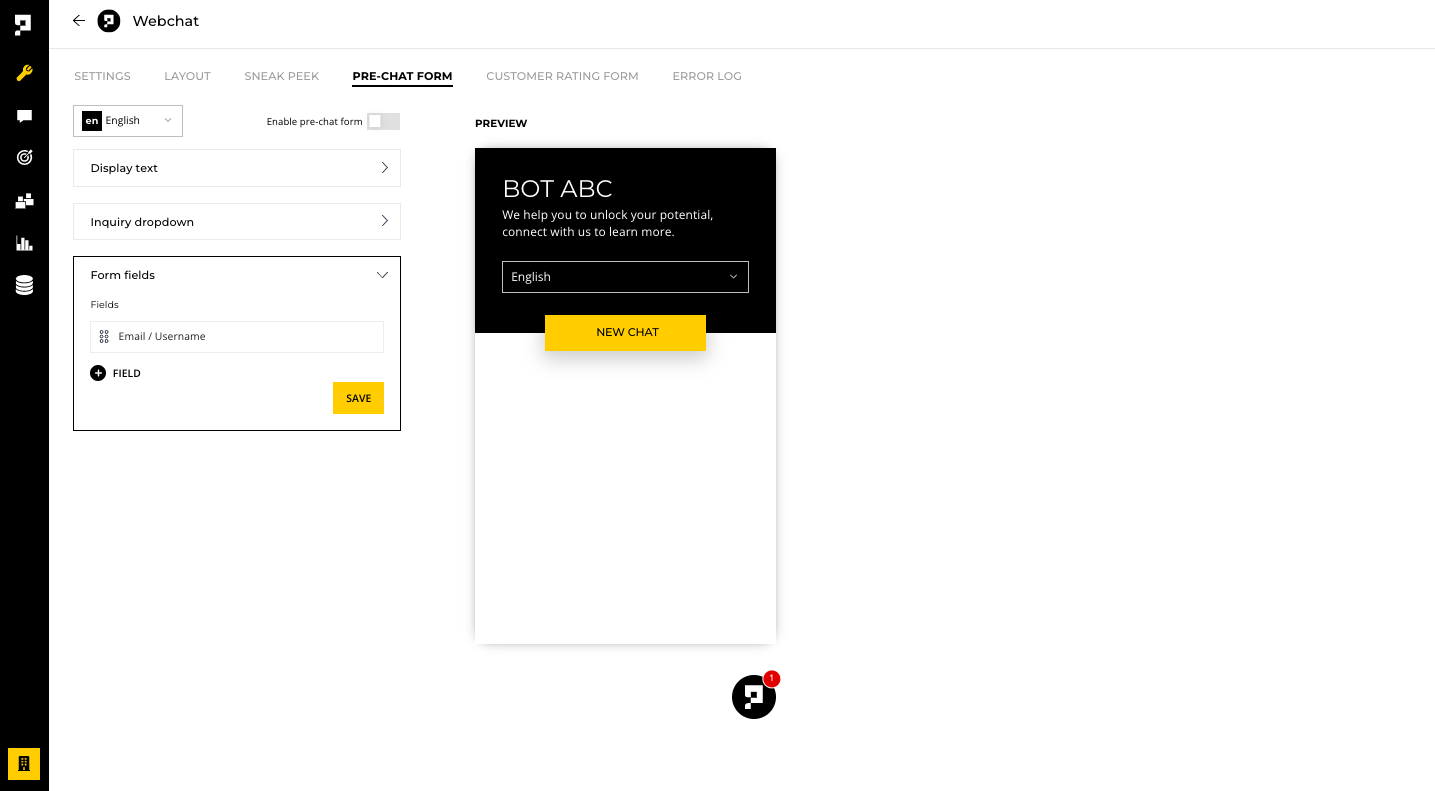
Pre-chat form
The PRE-CHAT FORM tab allows you to gather essential information from customers before starting a chat session. You can customize the form according to your business needs with the following options:
- Enable - This option makes the pre-chat form available to customers.
- Display text - You can modify the title, subtitle, and chat button to match your branding or messaging.
- Inquiry dropdown - You can create custom questions to gather specific information about your customers, such as their product preferences.
- Form fields - This feature lets you collect information from customers. For example, you can choose to ask for their name, email address, or contact number.
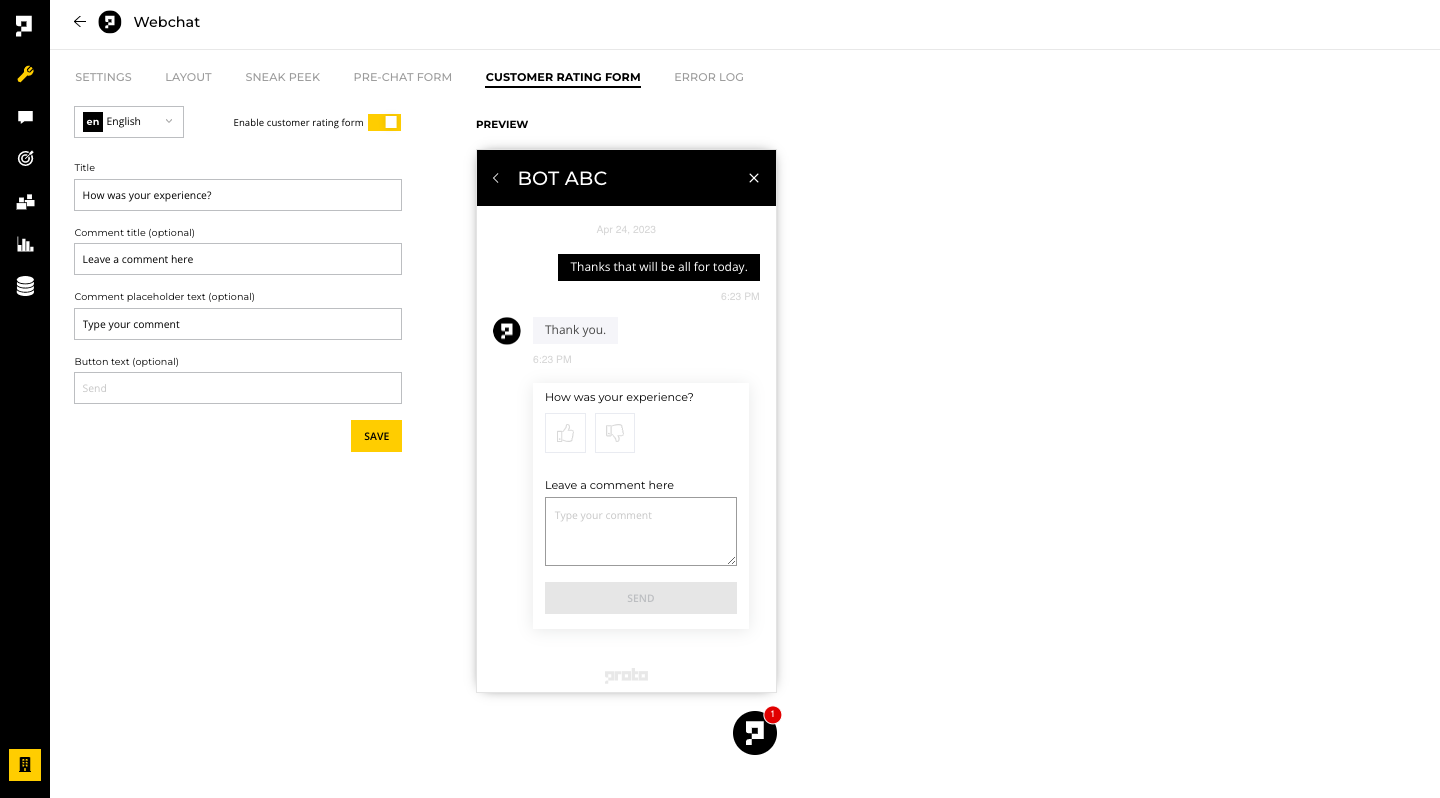
Customer rating form
In the CUSTOMER RATING FORM tab, you can gather valuable feedback from customers about their chat experience. The following options are available for customization:
- Enable - This option makes the rating form available to customers, so they can provide feedback on the chat session.
- Display text - You can modify the comment title, comment placeholder, and button text to encourage customers to provide useful feedback.
With the Webchat channel, you can customize the look and feel of the chat widget, including the color scheme and messaging style, to align with your website's branding.
Best practice
Setting up multiple Webchat channels for a single chatbot can be useful depending on the organizational structure of your company. This can enable your chatbot to handle different types of inquiries or support multiple business units. By utilizing multiple channels, you can improve the efficiency of your chatbot and ensure that customers are directed to the appropriate department or team for assistance.
Updated over 1 year ago