
Microsoft Teams
The Microsoft Teams channel allows chatbots and agents to chat with customers via Microsoft Teams.
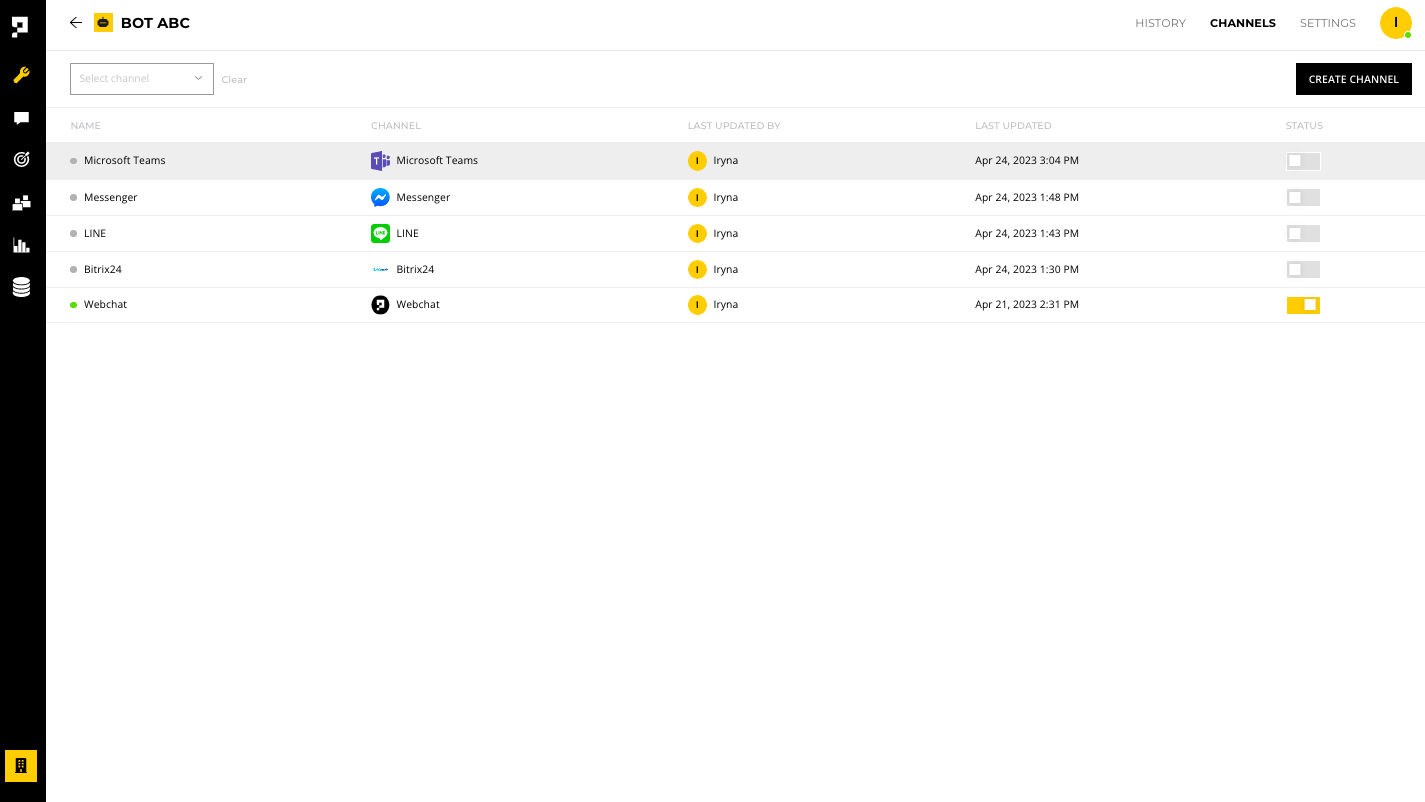
Once you add a Microsoft Teams channel, click anywhere on the channel row to configure it.
Requirement
The Microsoft Teams channel must be enabled before you test it. To enable the channel, click the STATUS toggle.
Before starting
Before starting, you must have a Office 365 E3 admin account.
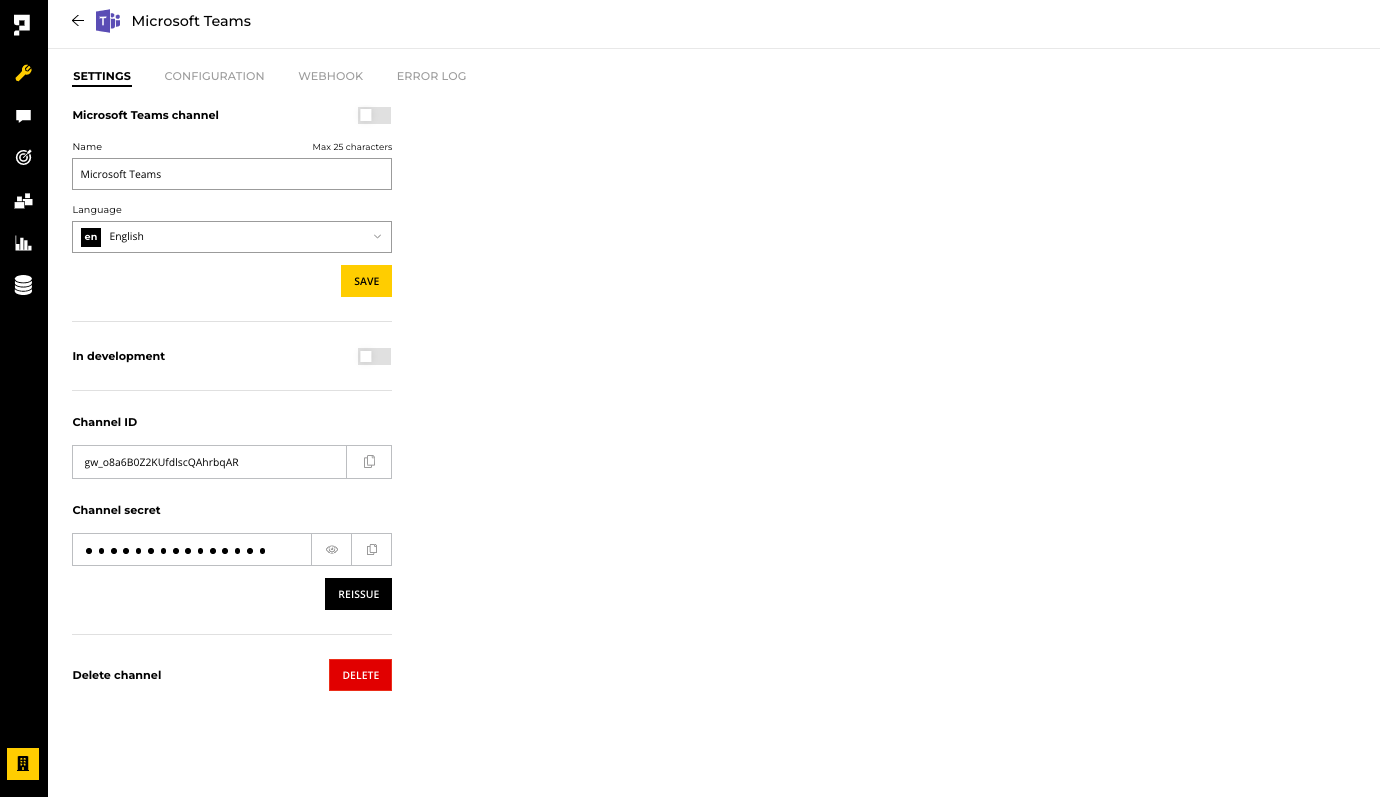
Settings
Under the SETTINGS tab, you have the following options:
- Enable - make the channel live to the public
- Name - edit the channel name within the AICX platform
- Language - set the default language for customers using this channel
- In development - make chatbot edits live only after when the chatbot is deployed
- Channel ID and Secret - required for the deploy script
- Delete - remove the channel
Important
Once a Microsoft Teams channel is deleted, you will need to reset up your Office 365 E3 admin account to the new Microsoft Teams channel.
Reminder
Once the channel is set to Live, please make sure you click the Deploy button every time you made changes on the bot.
Microsoft Bot Framework setup
Complete the following steps to set up your Microsoft Bot Framework:
- Login to Microsoft Bot Framework with your organization Office 365 E3 admin account.

- Create a New bot with this link. Please do not click on the Create bot button to create a new bot (you will need a Microsoft Azure account if you create bot with the button).

- Fill in the bot profile:
i. Bot Icon
ii. Display name
iii. Bot handle A bot handle represents a bot's registration with the online Azure Bot Service. This registration is associated with an HTTP webhook endpoint and registrations with channels. The Azure Bot Service ensures uniqueness of bot handles. The Azure portal performs a case-insensitive uniqueness check (meaning that case variations of bot handle are treated as a single handle) although this is a characteristic of the Azure portal, and not necessarily the bot handle itself.
iv. Long Description
v. Messaging Endpoint (You can get the Endpoint from Proto AICX platform WEBHOOK page)
vi. Click on Create Microsoft App ID and password- Sign in with your organization Office 365 E3 admin account
- Go to the app registrations blade and click New registration in the action bar at the top.

vii. Enter a display name for the application registration in the Name field and select the supported account types. The name does not have to match the bot ID.
viii. In the Supported account types, select the 2nd ( Accounts in any organizational directory (Any Azure AD directory - Multitenant)) or 3rd (Accounts in any organizational directory (Any Azure AD directory - Multitenant) and personal Microsoft accounts (e.g. Skype, Xbox) radio button) option.
ix. Click Register
Reminder
If the 1st option in Supported account types is selected, the bot will be unusable.

x. After a few moments, the newly created app registration should open a blade. Copy the Application (client) ID in the Overview blade.

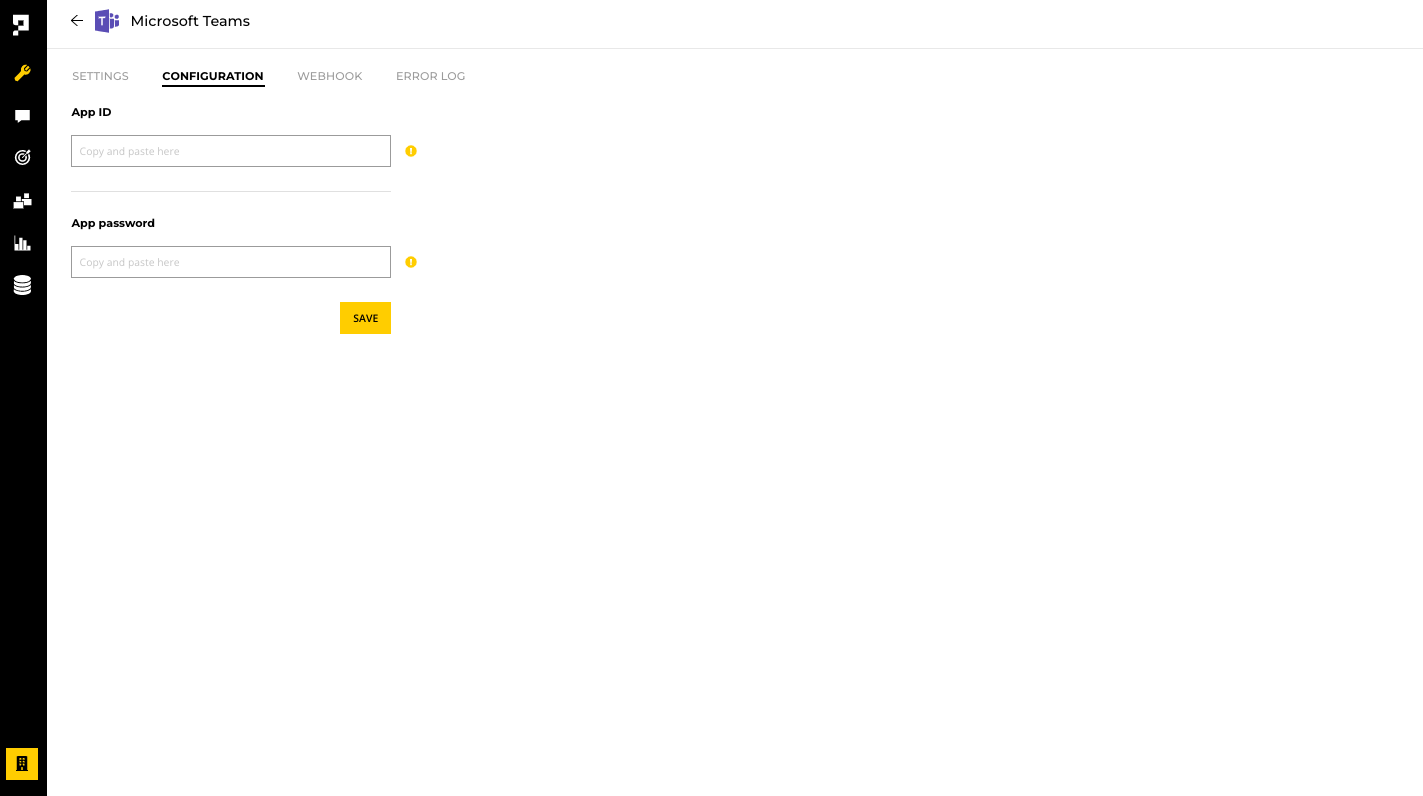
xi. Go back to the Microsoft Bot Framework page and paste it in to the App ID field.

xii. You can add more emails of the people who have permission to edit this bot (or else you can skip this step).

xiii. Tick on the terms agreement and click on Register
xiv. Now, you have successfully created a bot on the Microsoft Bot Framework.
xv. Click the Microsoft Teams icon to connect the bot to the Microsoft Teams channel.

xvi. Select Microsoft Teams Commercial (most common) option and click Save.

xvii. Go back to the Microsoft Azure website, copy the Application (client) ID in the Overview blade again and paste it in Proto AICX platform CONFIGURATION page.
xviii. Scroll to Manage tab on the left panel, click on Certificates & secrets in the left navigation column of your app registration's blade. Click the New client secret button..

xix. In the dialog that pops up, select Never from the Expires radio button group and click Add.

xx. Copy your secret's value from the table under Client secrets and paste it into the App Password field in Proto AICX platform CONFIGURATION page.

Add Bot to Microsoft Teams
- Login to Microsoft Teams with your organization Office 365 E3 admin account.
- Click on the three dots … and search for Developer Portal on the search bar.
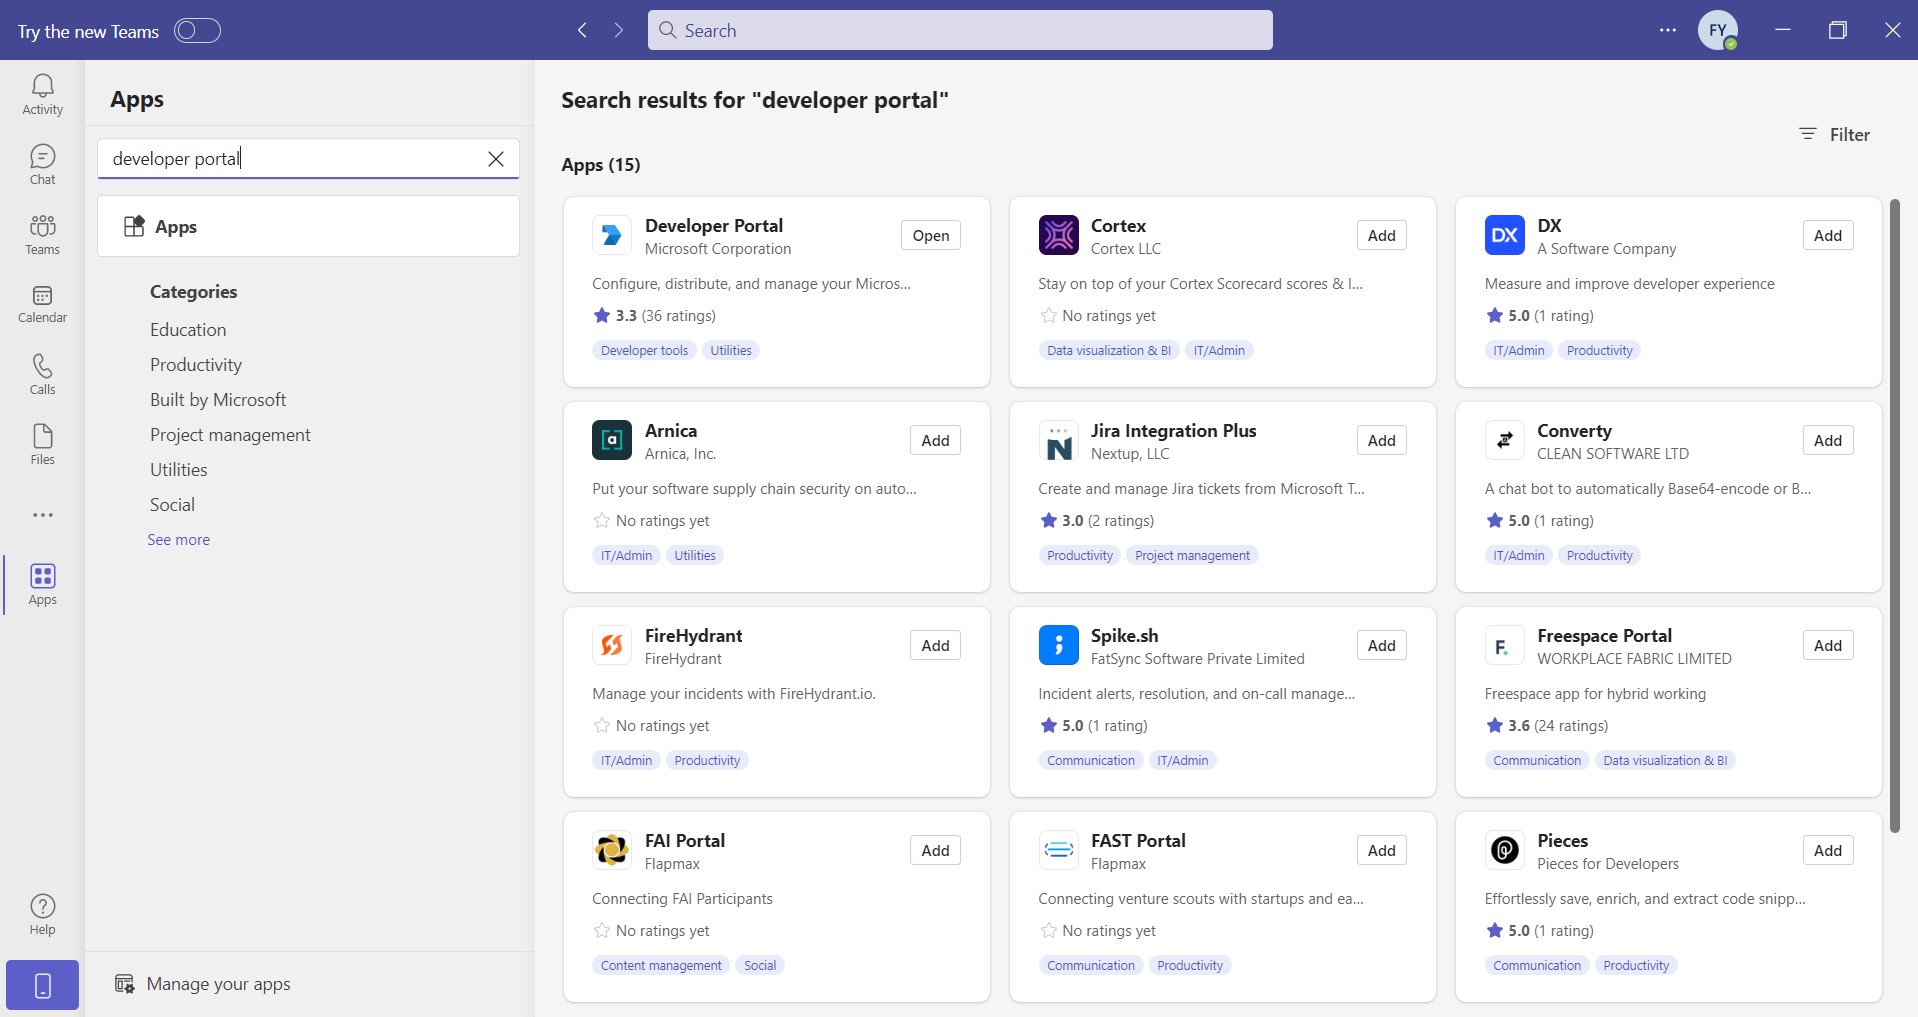
- Select the Apps tab and click on + New app

- Provide a name for the app and click Add. In the Basic Information field, fill in the following details:
- Fill in any value in short name, full name.
- Fill in the short description, full description, version, developer information, app URLs.
- Go back to your Azure Active Directory (step 3.x.) copy the Application (client) ID and paste it on the Application (client) ID.
- Click Save once every information is filled.

- In the Configure section, select App features and select Bot.

- Select anexisting bot that you've created from the Bot Framework (step 2).
- In
What can your bot do?section, tick "Upload and download files" - In Scope option, tick Personal and Teams for the scope.
- Click Save.

- Click Publish your app and select Download the app package to download the bot in zip file.

- Go back to Apps panel on the left, scroll to the bottom and go toManage your apps. Click on Upload an app to upload the zip file (Step 6).
- Openthe app created and start chatting with the bot.

Add the bot for all Microsoft Teams User in Your Organization
- Login to your organization Microsoft 365 admin center
- Select Teams on the left panel

- Go to Team apps tab and select Setup policies and click on Global (Org-wide default)

- In Installed apps section, click on the Add apps button

- Search the bot app and click Add

- To pin the bot app on the left panel for all Microsoft Teams user in your organization, go to Pinned apps section

- Click on Add apps and search the bot app and click Add
- Click Save to setup the bot for all user in your organization
- After you edit the setup policy, it can take a few hours for changes to take effect on all users account (around 2 hours).
Updated 8 months ago